This article hopefully offers you (a C# developer) a jumpstart at creating your first Shipping Integration for boxwise.
Before you begin
In order to follow this Quickstart Guide you have to have installed the following tools and frameworks.
- Make sure you run a laptop or pc with Windows 10 or higher on it
- Install dotnet (version 5 or higher. Run
dotnet --versionto check which version you might currently have.) - Install boxwise (request the latest version through boxwise.nl)
Additional prerequisites
- It highly recommended to have one of the following IDE's installed on your system:
- Microsoft Visual Studio 2019 or higher
- Jetbrains Rider
Install the template
- Open a powershell window
- Run:
dotnet new --install Boxwise.ShippingLayer.ProjectTemplates
- If everything went ok you should see something like this:
The following template packages will be installed:
Boxwise.ShippingLayer.ProjectTemplates

Success: Boxwise.ShippingLayer.ProjectTemplates::1.0.1 installed the following templates:
.....
Create your project
Now that you have installed the dotnet new template we can continue creating your first Shipping Integration Plugin!
- Open a powershell window and descend into a working folder of your choice (this is the folder your project will be created. Make sure you have write access to this folder)
- Run the command below where you optionally replace Company.Plugin for the actual name of the project. This will also be the namespace of your code by default.
dotnet new boxwise-shippinglayer -o Company.Plugin
- Descend into the folder that was created in step 2 and run:
dotnet build
- If everything ran ok you will see an output similar to below:
...

Build succeeded.
0 Warning(s)
0 Error(s)
Open project in an IDE (Integrated Development Environment)
- Open the IDE of your choice and select open project
- Navigate to the location of the project created in the previous steps
- Select the project file and click open
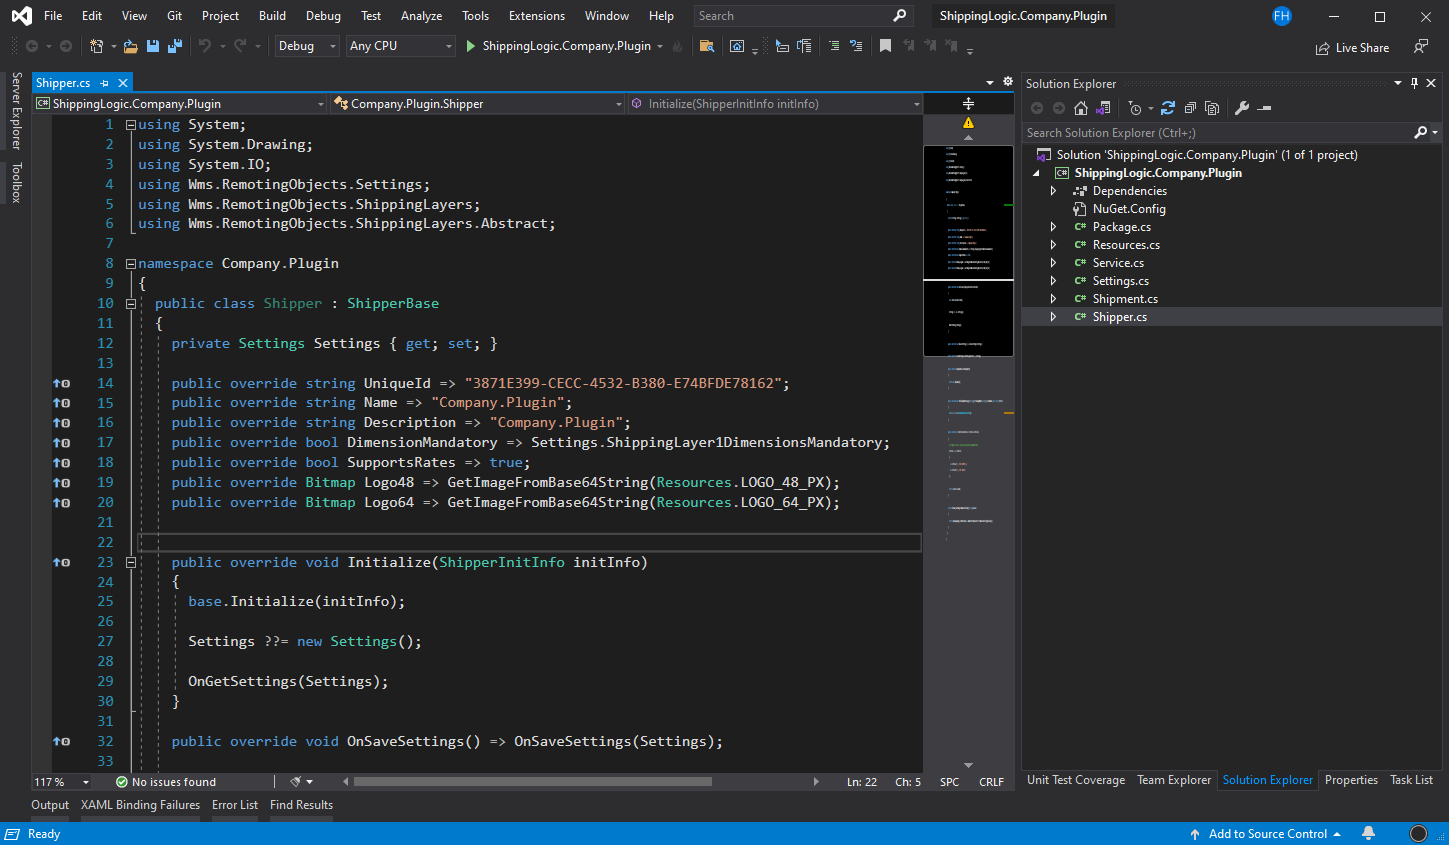
Sample project in VS2019
Updating nuget packages
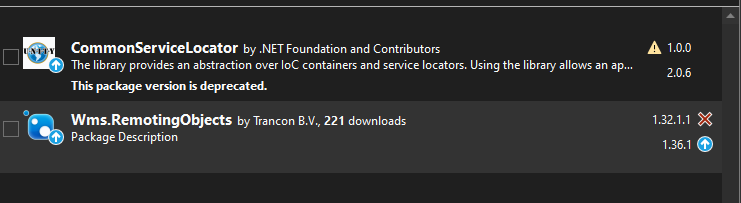
- When targetting a version of boxwise 1.34 or higher you need to update `CommonServiceLocator` nuget package from 1.0.0 to 2.06
- Update the `Wms.RemotingObjects` nuget package according to the targetted boxwise version. To do this you need to add the use the nuget package source `http://nuget.app.boxwise.nl/`
Summary
To summarize what we have just done:
- ✅ We've installed the prerequisites needed
- ✅ We've created our first Shipper Integration Plugin project for boxwise! 🥳
The next step is to deploy the plugin to boxwise. To do this you can follow this guide: Deploying your project to boxwise